静的ファイル Static Files
認証のviewとテンプレートは機能しても、今はとても貧相な見た目です。作成したHTMLレイアウトにスタイルを加えるために、いくつかCSSを追加できます。スタイルは変化しないので、テンプレートというよりも静的(static)ファイルになります。 The authentication views and templates work, but they look very plain right now. Some `CSS`_ can be added to add style to the HTML layout you constructed. The style won't change, so it's a *static* file rather than a template.
Flaskはflaskr/staticディレクトリからの相対パスを取り(対応するファイルを)支給するstaticのviewを自動的に追加します。base.htmlテンプレートは、既にstyle.cssファイルへのリンクを持っています:
Flask automatically adds a ``static`` view that takes a path relative to the ``flaskr/static`` directory and serves it. The ``base.html`` template already has a link to the ``style.css`` file:
{{ url_for('static', filename='style.css') }}
CSSに加えて、他の種類の静的ファイルにロゴ画像やJavaScript関数のファイルがあるかもしれません。それらはすべてflaskr/staticディレクトリの下に置かれ、url_for('static, filename='...')を使って参照されます。
Besides CSS, other types of static files might be files with JavaScript functions, or a logo image. They are all placed under the ``flaskr/static`` directory and referenced with ``url_for('static', filename='...')``.
このチュートリアルでは、CSSの書き方には注目しませんので、以下をflaskr/static/style.cssファイルにただコピーしてください:
This tutorial isn't focused on how to write CSS, so you can just copy the following into the ``flaskr/static/style.css`` file:
flaskr/static/style.css¶html { font-family: sans-serif; background: #eee; padding: 1rem; }
body { max-width: 960px; margin: 0 auto; background: white; }
h1 { font-family: serif; color: #377ba8; margin: 1rem 0; }
a { color: #377ba8; }
hr { border: none; border-top: 1px solid lightgray; }
nav { background: lightgray; display: flex; align-items: center; padding: 0 0.5rem; }
nav h1 { flex: auto; margin: 0; }
nav h1 a { text-decoration: none; padding: 0.25rem 0.5rem; }
nav ul { display: flex; list-style: none; margin: 0; padding: 0; }
nav ul li a, nav ul li span, header .action { display: block; padding: 0.5rem; }
.content { padding: 0 1rem 1rem; }
.content > header { border-bottom: 1px solid lightgray; display: flex; align-items: flex-end; }
.content > header h1 { flex: auto; margin: 1rem 0 0.25rem 0; }
.flash { margin: 1em 0; padding: 1em; background: #cae6f6; border: 1px solid #377ba8; }
.post > header { display: flex; align-items: flex-end; font-size: 0.85em; }
.post > header > div:first-of-type { flex: auto; }
.post > header h1 { font-size: 1.5em; margin-bottom: 0; }
.post .about { color: slategray; font-style: italic; }
.post .body { white-space: pre-line; }
.content:last-child { margin-bottom: 0; }
.content form { margin: 1em 0; display: flex; flex-direction: column; }
.content label { font-weight: bold; margin-bottom: 0.5em; }
.content input, .content textarea { margin-bottom: 1em; }
.content textarea { min-height: 12em; resize: vertical; }
input.danger { color: #cc2f2e; }
input[type=submit] { align-self: start; min-width: 10em; }
コード例では、もう少し内容のあるstyle.cssが見つかります。
You can find a less compact version of ``style.css`` in the :gh:`example code <examples/tutorial/flaskr/static/style.css>`.
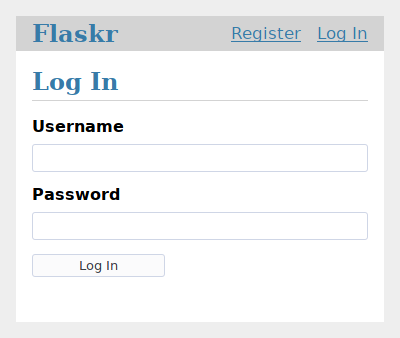
https://127.0.0.1:5000/auth/loginへ行くと、以下のスクリーンショットのようなページが見られるはずです。 Go to http://127.0.0.1:5000/auth/login and the page should look like the screenshot below.
MozillaのドキュメントでCSSについてさらに読むことができます。もし静的ファイルを変更する場合は、ブラウザのページを更新してください。もし変更が表示されない場合、ブラウザのキャッシュのクリアを試してください。 You can read more about CSS from `Mozilla's documentation <CSS_>`_. If you change a static file, refresh the browser page. If the change doesn't show up, try clearing your browser's cache.
ブログの青写真(Blog Blueprint)へ続きます。 Continue to :doc:`blog`.